 |
| Round Gelli Plate background created with acrylic paint, textured foam sheets and stencils Waterlily painted with acrylic, iridescent medium, Gelly Roll Pens.
OK, I am officially in love with my round Gelli Plate. The mandala shape is just so exciting and inspiring. I found
myself wanting to paint flowers enclosed in that shape. Blue acrylic paint and the textured foam sheet and stencil really
made me think of water. Love the way the paint that makes up the waterlily petals is kind of translucent (the plus side
of bargain paint). The Gelli Roll pens made for fun, shiny marks. Overall I like that the feeling of color shimmering
in a watery environment.
|
Saturday, June 28, 2014
Round Gelli Plate Water Lily

Tuesday, June 24, 2014
Betty's Ficus
Had a drawing date with Alice and Betty a week after we met to draw in Alice's garden. I had
a page in my art journal that I had sprayed with acrylic ink spray and stencils. I had made
acrylic ink spray by adding water and droppers of FW acrylic ink to an empty spray bottle.
The colors are subtler than water soluble spray inks like Dylusions but the real attraction for me
is that they are permanent and won't bleed when you layer over them. I decided to do a drawing
based on the large Ficus tree that Betty had near her drawing table. I did the drawing with
Derwent InkTense watersoluble pencils and used a brush to move the color around. I love
patterned backgrounds, like Matisse uses in his paintings so really like this drawing on top of
a patterned background. Since the ink spray is permanent I could have also used gesso to
white out the areas inside the sketch so that the background pattern would read like the
fabric drapes in Matisse's work. I think I like the way the pattern looks on the trunk and
branches in this drawing. I last added watercolor to the pot to give it dimension and washi
tape to bound the page. I will later post the adjoining pages that also have this washi tape
border. I last scanned and printed out a copy of this page to make a thank you card for
Betty for her hospitality. I added more color and detail to the card. Using Gelly Roll Pens.
Painting of Alice's Shrine for Her Sister
 |
| Drawing with watercolor and mixed media
When Alice's sister died Alice made a lovey shrine for her with leaves, rocks, a special cloth and marigolds.
I had the opportunity to see a photograph of the shrine and just loved the image she had captured. I got
permission to paint it and really like the outcome. I did a fairly elaborate pencil drawing, inked it, then used
watercolor to color it. I did end up using acrylic paint on the marigolds since I was not happy with how the
watercolor painting of them turned out. I am especially happy with the way the cloth turned out. I used
Cerulean Blue to begin with, then Ultramarine. I finally lifted areas by painting them with clear water and
blotting the wet area with paper towel. I like the way the drawing was more revealed in these areas.
This drawing was in my art journal. I've since matted it and given it to Alice for letting me share in her
honoring of her sister.
|
Drawing in Alice's Garden

Peony Thank You card for Alice
 |
| Peonies in Alice's Garden Pencil sketch with Koi Watercolor and Sharpie Pen
My friend Alice and her husband have a back yard that is entirely given to a vegetable garden and flowers. I was lucky
enough to be invited to paint in her garden. Her peonies were glorious!! Ended up scanning and printing out this piece
to make a card to send to Alice.
|
Monday, December 30, 2013
Visual Journal Spread: Protect Your Sacred Space
 |
| Temple Guardian Spread, Right page There are a lot of layers here and the last bit, the journaling, has still to be added. I collaged images of the Tara or Guanyin being protected by a temple guardian. The first layer of the page was a hand made stamp using Wood Icing on styrofoam to create the stamp. I painted over the stamped images with iridescent acrylic. I used my Big Shot to emboss sticky backed metal sheets (Ranger) with an embossing folder called "Pattern and Stitches Set" by Tim Holtz. I used the metal strips for a border all around my pages. I last added the mandala using a stencil from the book Stencil Me In, by Marthe Le Van. This book, which I found on sale, included 28 light-weight stencils! I used color box ink and a cheap pouncing tool, which is just a stick with a foam gumdrop shape attached that you can find at any art supply store along with the craft paints. I really like the subtle look of ink applied this way. Finally, on the edge I tried Faber Castell Gelatos , which I had never tried before. A pigment stick sort of creamy like lipstick. The fuchsia line on both pages was done with a Gelato stick, blended with my finger. Will try those again! I have found them in small sets of related colors at craft stores. I had not found the National Geographic images of the Chinese figures found in a cave when I prepared this page with all the right colors. Overall, my favorite thing about these pages is the range of colors. I remember once being in an American Hindu temple that had walls of this color. I was told, at the time, that this pinkish color is the color of the heart and supports meditation. I had good fun cutting out shapes from the fabric picture on the magazine pages to fit the upper corners. |
 |
| Temple Guardian Spread, Left Page I this page I collaged a fierce temple guardian protecting the Buddha statue. I used all the same techniques that I used on the right page. I added the words: "Protect your serenity. Protect what is sacred"
These pages are something about my need to set a new level of priority surrounding the importance of honoring
and protecting what is sacred to me. What IS sacred to me is my meditation and my art making. Lately I have been mostly focused on stressing about how to make a living as an adjunct college teacher and an artist. The adjunct work has been shrinking over the last few years but it really became alarming when I was only offered
one class for the January term. It has been ok in the past because I'm also working a bit for other schools and
I can make my finances work with three classes at my primary school and other art courses I can teach, art I
can sell and individual classes from other schools. Suddenly I am terribly under employed!
Part of me is saying, "do what you love and the money will follow" but another is listening to creditors and
realizing that I just need a JOB, any job. But how does one protect their sacred space when working in the market place? How do I get my just short of retirement age body to do what I need to do to work along side the young and vigorous workforce of today? I remember being one of those dynamos, working all hours and 2 or three jobs at a time. Be I am now in the place where I work for a while on my projects at home, or work in the classroom for several hours, and then go and take an hour nap. I suspect that my soon to be employer may not approve of my required naps, lol.
I also have a renter moving in, another teacher who is getting divorced, who just needs a couch to sleep on
while he is making a meaningful mosaic of his shattered life. He also identifies as a Buddhist but seems to be somewhat dismissive of much of the strange mixture of art/psychology and spirituality that comprises my world. So how do I protect my unique self from the onslaught of an extroverted masculine who is soon to arrive? How do I protect my sacred space? An adventure is soon to begin. I'll keep you informed. |
Sunday, September 15, 2013
September 2013 Calendar Spread

| ||
| Dylusions Spray Ink (Pure Sunshine), inked edges (could have been Ranger) Leaf stamp (Rubber Stampede), metallic markers. |

Sunday, August 4, 2013
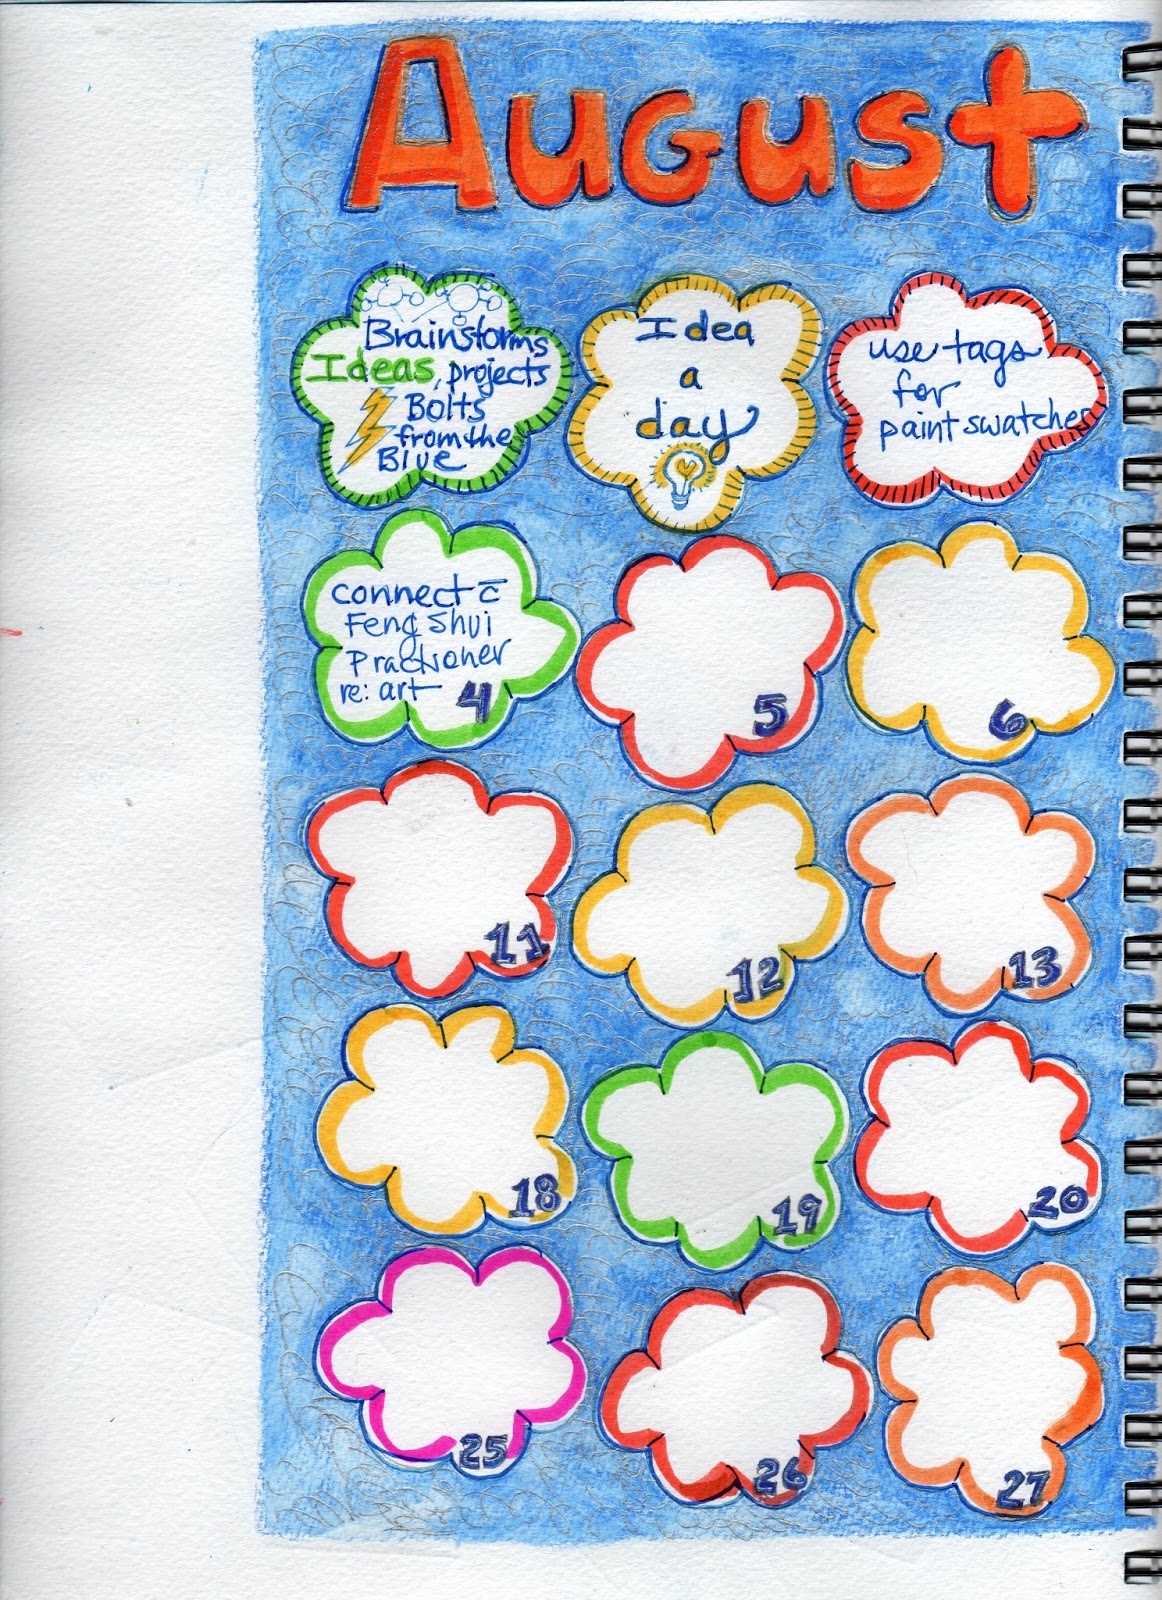
August 2013 Idea-A-Day Journal Spread

 |
| Cloud shape cut out of a foam dinner plate used approximately a 2" square |
In July I saw someone Else's calendar spread, a field of flowers, but it reminded me of a painting I
loved when I was younger: Georgia O'Keeffe "Sky Above Clouds IV" . It made me want to create
a sky full of clouds for August and do a Dream-a-Day record for August. Cut out a cartoon cloud
shape (doesn't look like O'Keeffe after all) from a foam dinner plate. It is so cool that I can cut out
any shape I want from a foam plate, as long as the shape falls within the approximately 2" square size,
and on a 8" X 10" journal page you can get 3 of those shapes on the left and 4 of the shapes on the
right (or do it the opposite way) to make your calendar for the month.
I made my foam template, traced around it, drew the month/title and numbered the days. The trouble
was, although I am a person who frequently remembers my dreams I didn't as August began. Instead
I have been waking up with brainstorms--ideas of projects to try and solutions to problems, feeling as
strident as marching orders. So my clouds became thought bubbles and here we are.
I used Tombo Markers for the words and numbers and to outline each thought bubble. Sharpie Pens
and Gelli Roll Metallic Pens for details. The background is Derwent InkTense Water soluble Pencil,
Iris Blue. Brushed around with water. I like the blotchy effect, like the real variations in a cloudy
sky. Already getting ideas for what I want to focus on each day for the next months. No surprise
since I am a person much more excited by the idea than the work involved in manifesting the idea;
although the process and all the problem solving and discovery is actually more fun in reality.
Subscribe to:
Posts (Atom)